Displaying page-specific header images in the Beautiful Pro theme
This tutorial focuses on StudioPress’s Beautiful Pro theme, a Genesis child theme not included in Themetry’s collection. However, the concepts discussed apply to many WordPress themes.
Inspect the header image banner
Before diving into code, investigate how Beautiful Pro handles the header image banner. Visit the Beautiful Pro demo site, right-click on the header image, and click “Inspect Element” (varies by browser; Firefox shown here).
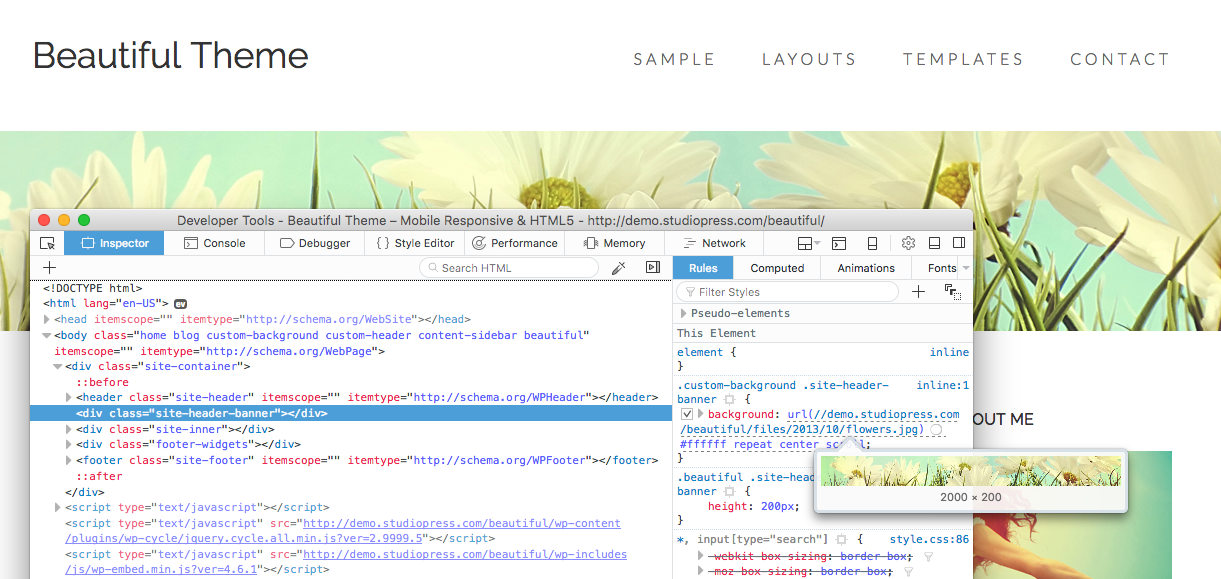
The header image uses an empty “site-header-banner” div with the image applied as a background in CSS. The image dimensions are 2000x200 pixels (2000 wide by 200 high).
While adjustable for different-sized header images, the current header size fits the design well, so modifications aren’t necessary.
Post-inspection recap
Key findings:
- Required dimensions for custom header images: 2000x200
- Header images use CSS background images, not
<img>tags - The CSS selector needed to override for new header images
With this information, header images can be customized with CSS alone. Add new images in the Media Uploader — no additional plugins or code editing required.
Finally, repeat for however many posts you want custom header images on.